How to Convert IMAP to POP3 Without Data Loss
If you are using an IMAP email account in Microsoft Outlook and want to switch to POP3, you should not simply delete the IMAP account and add the POP3 account. The safest approach is to protect your existing mailbox first, create a reliable backup, configure POP3 separately, test the new account and then migrate your required email data.
This guide explains how to convert IMAP to POP3 without data loss in classic Microsoft Outlook 2007, Outlook 2010, Outlook 2013, Outlook 2016, Outlook 2019, Outlook 2021 and Outlook 2024.
Quick Answer: How to Convert IMAP to POP3
The safest IMAP-to-POP3 migration method is:
Synchronize IMAP → Create PST Backup → Verify Backup → Add POP3 → Test Email → Copy Historical Email → Remove IMAP
Do not delete the IMAP account until you have verified your backup and confirmed that the POP3 account can send and receive email successfully.
IMAP vs POP3: What Is the Difference?
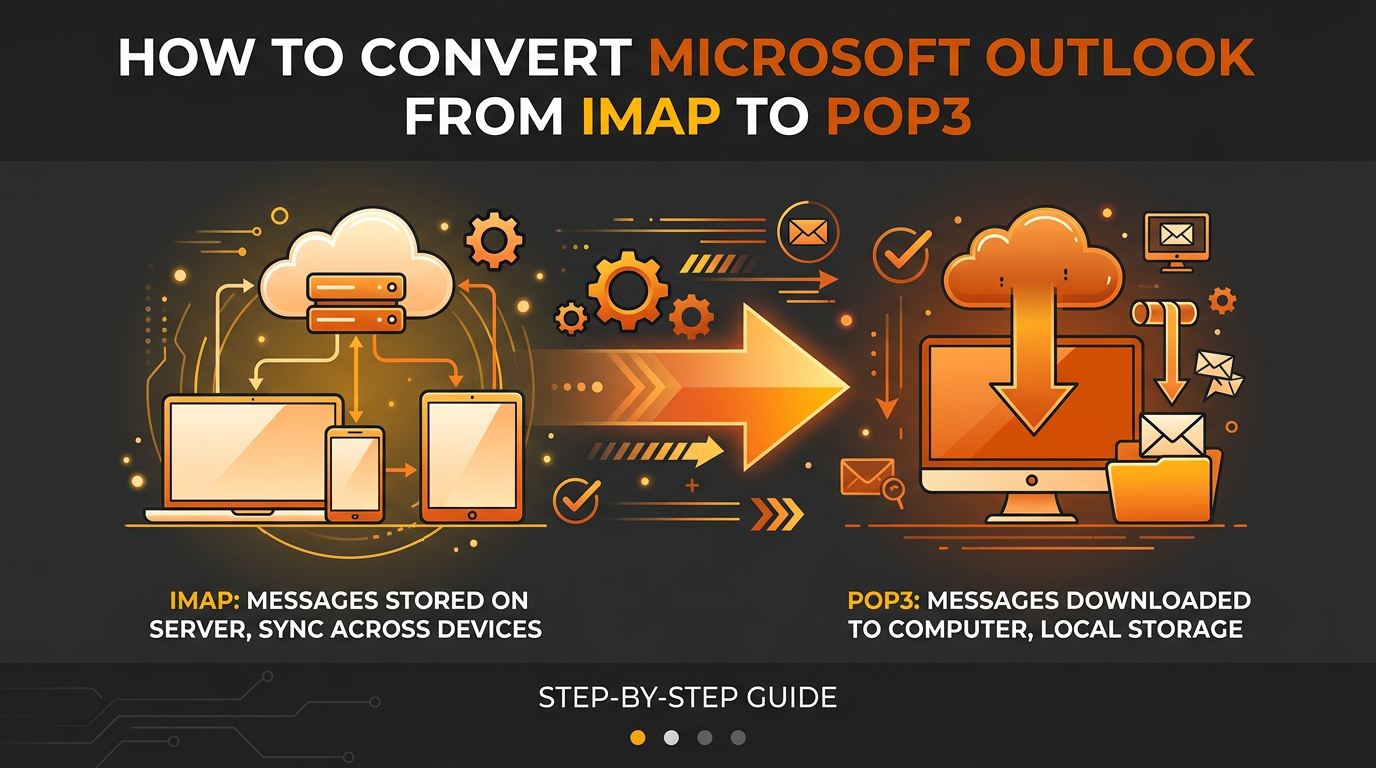
IMAP and POP3 are two different email protocols. Understanding how they work is important before changing your Outlook email configuration.
What Is IMAP?
IMAP stands for Internet Message Access Protocol. It keeps your email synchronized with the mail server. When you read, move, delete or organize messages, those changes can be synchronized across supported email clients and devices.
IMAP is useful when the same mailbox is accessed from Outlook, webmail, smartphones, tablets or multiple computers.
What Is POP3?
POP3 stands for Post Office Protocol version 3. It is primarily designed to download incoming email messages from the mail server to an email client such as Microsoft Outlook.
Depending on your Outlook configuration, POP3 can either leave downloaded messages on the server or remove them after downloading.
Why Convert IMAP to POP3?
There are several reasons a user or business may want to move from IMAP to POP3.
- Store email locally on a computer.
- Reduce the amount of email stored on the mail server.
- Create a local PST archive.
- Download incoming messages automatically.
- Migrate an older email account.
- Maintain a local copy of historical email.
- Move from server-based mailbox storage to local Outlook storage.
However, POP3 does not provide the same folder synchronization capabilities as IMAP. Therefore, the migration should be planned carefully.
Is There a Direct IMAP to POP3 Conversion Option in Outlook?
Microsoft Outlook does not provide a single button that directly converts an IMAP account into a POP3 account. Instead, the recommended approach is to back up your existing data and then configure the email account using POP3.
Step 1: Do Not Delete Your IMAP Account
Never start the migration by deleting your existing IMAP account. First make sure Outlook has synchronized the mailbox completely and that your important messages are available.
Step 2: Make Sure Your IMAP Mailbox Is Fully Synchronized
Allow Outlook enough time to synchronize the complete mailbox before creating your backup.
Check the following folders:
- Inbox
- Sent Items
- Drafts
- Deleted Items
- Custom folders
- Subfolders
- Important attachments
Check Your Webmail
Log in to your email account through webmail and verify that your important messages and folders are available on the server. This is particularly important for business email accounts.
Step 3: Export Your IMAP Mailbox to a PST File
Before changing the account configuration, create a PST backup of your important Outlook data.
In supported classic Outlook versions, open:
File → Open & Export → Import/Export
Select:
Export to a file → Outlook Data File (.pst)
Select the mailbox or required folders and make sure Include subfolders is enabled.
Use a descriptive filename such as:
email-backup-before-pop3-2026.pst
Step 4: Verify the PST Backup
Creating a PST file is not enough. Open the PST separately in Outlook and verify that your important messages, folders, attachments and historical emails are accessible.
For important business email, consider keeping another copy of the PST on a secure external drive or backup system.
Step 5: Add the Same Email Account as POP3
Once your backup has been verified, add the same email address as a POP3 account.
You do not need to immediately remove the IMAP account. Keeping both configurations temporarily allows you to test POP3 while the original mailbox remains available.
Example:
- Existing: info@example.com — IMAP
- New: info@example.com — POP3
Step 6: Configure POP3 Email Settings
POP3 and SMTP settings depend on your email hosting provider. A typical secure hosting configuration may look like this:
Incoming POP3 Settings
- Server: mail.yourdomain.com
- Port: 995
- Encryption: SSL/TLS
Outgoing SMTP Settings
- Server: mail.yourdomain.com
- Port: 465 or 587
- Encryption: SSL/TLS or STARTTLS, depending on the server
- Authentication: Required on most hosting mail servers
Always use the exact POP3 and SMTP settings supplied by your email hosting provider.
Outlook 2024: How to Add a POP3 Account
In classic Outlook 2024, start from:
File → Add Account
Enter your email address and use the advanced or manual configuration option if Outlook automatically selects another protocol.
Select POP and enter the POP3 and SMTP settings supplied by your hosting provider.
Outlook 2021: How to Add POP3
Open File → Add Account, enter the email address and use the advanced setup option.
Select Let me set up my account manually → POP and enter the required POP3 and SMTP settings.
Outlook 2019: How to Add POP3
Open File → Add Account. Enter the email address and select the advanced/manual configuration option.
Select POP and enter your incoming POP3 server, POP3 port, encryption, SMTP server and SMTP port.
Outlook 2016: How to Add POP3
Open File → Add Account. If Outlook does not automatically configure the account as POP3, select the manual configuration option and choose POP.
Outlook 2013: How to Add POP3
Open File → Add Account and select the manual configuration option.
Select POP or IMAP and enter your POP3 and SMTP server settings.
After adding the account, use Send/Receive → Send/Receive All Folders to test it.
Outlook 2010: How to Add POP3
Open File → Account Settings → Account Settings and select New.
Choose manual configuration, select Internet E-mail, and then select POP3.
Enter your name, email address, POP3 server, SMTP server, username and password. Open More Settings and configure SMTP authentication if required.
Outlook 2007: How to Add POP3
Outlook 2007 uses an older account setup interface.
Open:
Tools → Account Settings → New
Select the Internet email configuration option and choose POP3.
Enter your email address, POP3 server, SMTP server, username and password.
Open More Settings → Outgoing Server and enable SMTP authentication if required by your hosting provider.
Step 7: Enable "Leave a Copy of Messages on the Server"
This is one of the most important POP3 settings during an IMAP-to-POP3 migration.
During the migration, enable:
Leave a copy of messages on the server
This provides an additional safety layer while you test the new POP3 configuration. Avoid automatically deleting server messages until you are certain that your migration is complete.
Step 8: Test the POP3 Account
Before removing IMAP, test the new POP3 configuration thoroughly.
- Send an email to the account from another email address.
- Click Send/Receive in Outlook.
- Confirm that the message downloads.
- Send an email from the POP3 account.
- Confirm the recipient receives it.
- Check Sent Items.
- Test attachments.
Step 9: Copy Existing Emails to Your New POP3 Setup
Adding a POP3 account does not automatically convert all existing IMAP folders and messages into the new POP3 account.
Your existing IMAP messages may remain associated with the old account or be preserved in your PST backup.
Copy Instead of Move During Migration
When transferring important historical email, use Copy instead of Move until you have verified that the migration is successful.
Copying preserves the original data and provides an additional recovery option if something goes wrong.
What Happens to Sent Items After Switching to POP3?
POP3 does not provide the same folder synchronization behavior as IMAP. Therefore, do not assume that existing server-side Sent Items will automatically become available as part of your POP3 account.
Preserve important historical Sent Items in your PST backup or copy them to an appropriate Outlook data folder.
What About Contacts and Calendar?
Email migration and Outlook contacts and calendar data are separate considerations.
Before removing your old account, check:
- Contacts
- Calendar
- Tasks
- Notes
OST vs PST: What Is the Difference?
IMAP and OST
Modern Outlook commonly uses an OST file for synchronized mailbox data. The local file represents synchronized information associated with the server mailbox.
POP3 and PST
POP3 accounts commonly use a PST file for locally stored Outlook email and other data.
Do Not Rename an OST File to PST
A common mistake is to find an OST file and simply rename the extension from .ost to .pst.
This is not a proper method for converting IMAP data into a PST backup. Use Outlook's supported export and data-copy functionality instead.
When Should You Delete the IMAP Account?
Remove the IMAP account only after confirming all of the following:
- PST backup has been created.
- PST backup opens successfully.
- Important emails are present.
- Attachments are accessible.
- POP3 receiving works.
- SMTP sending works.
- Historical emails are accessible.
- Important Sent Items are preserved.
- Contacts and calendar have been checked.
- Required server-side email remains available.
Recommended IMAP to POP3 Migration Process
- Keep the IMAP account active.
- Allow Outlook to synchronize completely.
- Verify your mailbox through webmail.
- Export Outlook data to a PST file.
- Open and verify the PST backup.
- Add the same email address as POP3.
- Enable "Leave a copy of messages on the server."
- Test sending and receiving.
- Copy historical emails where required.
- Keep the PST as a backup.
- Use POP3 normally.
- Remove IMAP only after everything has been verified.
Outlook 2007 to Outlook 2024: Quick Comparison
| Outlook Version | Recommended Approach |
|---|---|
| Outlook 2007 | Manual POP3 configuration and PST backup |
| Outlook 2010 | Manual POP3 configuration and PST backup |
| Outlook 2013 | Manual POP3 configuration and PST backup |
| Outlook 2016 | Manual/advanced POP3 configuration and PST backup |
| Outlook 2019 | Advanced POP3 configuration and PST backup |
| Outlook 2021 | Advanced POP3 configuration and PST backup |
| Outlook 2024 Classic | Advanced/manual POP3 configuration and PST backup |
Common Problems After Converting IMAP to POP3
Old Emails Are Missing
Check your PST backup and old IMAP folders. Do not immediately delete the old Outlook data.
POP3 Downloads Duplicate Emails
Check whether the account is still configured as both IMAP and POP3 and review the POP3 server-copy settings.
Emails Disappear From the Server
Check whether Outlook is configured to remove downloaded messages from the mail server.
Sent Emails Are Missing
POP3 does not synchronize folders in the same way as IMAP. Preserve historical Sent Items in your PST.
Outlook Cannot Connect
Check the server hostname, username, password, POP3 port, SMTP port, SSL/TLS settings and SMTP authentication.
Choosing Reliable Hosting for Business Email
Your email configuration is closely connected to the reliability of your hosting and mail infrastructure. If your business website and email are hosted on the same platform, dependable server performance, security and technical support become especially important.
Website Hosting for Businesses
If you need reliable hosting for a business website and professional email accounts, explore our Website Hosting solutions from Syed's Group.
All-in-One Hosting
Businesses looking for a broader hosting package can also explore our All-in-One Hosting solution.
E-Commerce Hosting
If your website is an online store, choosing hosting designed for e-commerce workloads can be important for website performance and reliability. Learn more about E-Commerce Hosting .
Dedicated Hosting
Businesses requiring greater server resources and dedicated infrastructure can explore Dedicated Hosting options from Syed's Group.
Best Practices for Business Email
If you are converting a business email account from IMAP to POP3, maintain at least one independent backup of your PST file.
- Keep the primary PST on a secure computer.
- Maintain a backup copy on an external drive.
- Use secure cloud or server backup where appropriate.
- Keep the original IMAP data until the migration has been verified.
- Do not enable automatic server deletion until you understand how POP3 will handle downloaded messages.
Frequently Asked Questions About IMAP to POP3 Conversion
Can I convert IMAP to POP3 without losing emails?
Yes. The safest approach is to synchronize the IMAP mailbox, create and verify a PST backup, configure POP3, test the account and remove IMAP only after the migration has been verified.
Can I use the same email address for IMAP and POP3?
Yes. During migration, you can temporarily configure the same email address using POP3 while retaining the existing IMAP configuration for verification.
Should I delete IMAP before adding POP3?
No. Create and verify your backup first. Keeping the existing IMAP configuration during migration provides an additional safety layer.
What is the difference between IMAP and POP3?
IMAP synchronizes mailbox messages and folders with the server, while POP3 primarily downloads incoming messages to the email client.
Which Outlook versions are covered?
This guide covers classic Outlook 2007, 2010, 2013, 2016, 2019, 2021 and Outlook 2024.
Final Recommendation
Converting IMAP to POP3 should be treated as an email migration rather than a simple account-setting change.
The safest process is to synchronize the IMAP mailbox completely, create and verify a PST backup, configure the same account as POP3, enable the appropriate server-copy setting, test sending and receiving, preserve historical email and only then remove the old IMAP configuration.
Backup → Verify → Add POP3 → Test → Copy/Archive → Remove IMAP
If you use professional business email and website hosting, choosing a reliable hosting environment is equally important. You can explore reliable website hosting in Pakistan from Syed's Group or review the All-in-One Hosting option for broader hosting requirements.